EDITING OUR NARRATIVE FOOTAGE
The first thing we edited was our narrative footage as we shot this before our studio footage. We started by renaming all our shots and removing any takes we knew we would not be using. When planning our narrative we had previously written on a sheet of our song lyrics where different shots would be place in the song:
 |
| The lyrics with our planned shots next to them |
As we had done this we were able to crop our shots by setting new start and end points and drag them onto the timeline with the correct lyric.
The next task was to create the split screens for all our shots and we did this by using the crop tool to make the shot smaller and changing the position to fit two shots onto the screen at the same time.
| Position change tool |
 |
| Crop tool |
 |
| An example of our split screen. |
via GIPHY
EDITING OUR STUDIO SHOTS
The next stage was to edit in our studio shots between our narrative footage. When we began to do this we found that editing our shots to fit with the lyrics did not look that good, so we decided as a group to edit the shots to the beat of the song instead which looked more professional.
In our video we use a lot of fast paced editing to go along with the fast beat in our track:
via GIPHY
We were able to be more creative when editing our studio shots as we had not specifically identified what shots we wanted to go where. Therefore I personally spent some time making some sequences with quick cuts to the beat between our different coloured set ups and I am proud of some of the results I had:
TEACHER FEEDBACK
At this stage in our edit we showed our sequence so far to our teacher and in her feedback she said she would like to see more variety in our editing, for example in the bridge section we should use a slower editing pace with more variety of transitions.
We created this grid sequence using the crop tool to add some variety:
 |
To create the sliding shots as seen in the gif above I used key frames so that the shots would slide across the screen after each other:
 |
| The key frames I added to change the motion of the shot. |
We also added some cross disolves between shots to slow the pace down:
 |
| Use of cross disolve in our video |
GRADING OUR SHOTS
The final stage after we had edited our sequence together was to grade our shots to make the colours more vibrant. I played a large role personally in grading our shots.
To begin with we used two tools, the three way colour wheel and adjust brightness and contrast.
However after grading our shots with these tools they did not give us the effect we wanted, it was hard to make the background as vibrant as we wanted without making the actors skin appear a strange colour. We also showed our video at this point to Josh aged 17 who is a member of our target audience and he said "The colours are good but they arent as vibrant as I would have liked. Maybe you can make the backgrounds bolder."
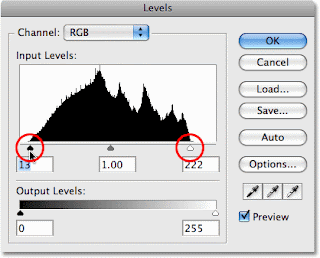
After speaking to our target audience and receiving some help we went about our grading in a different way using the levels and brightness tool to grade our shots. This gave a much more professional result making the colours much richer and the shots appear less flat.
 |
| Non- graded image |
 |
| Graded image |
After grading our video was finished, and as a group we were extremely pleased with the finished project and how far our video had transformed since the rough cut.


